Outlook Express POP3 Mail Account Setup
1- To set up the account, first open Microsoft Outlook Express. You do not need to be connected to the Internet to set up your POP3 email account in the program.
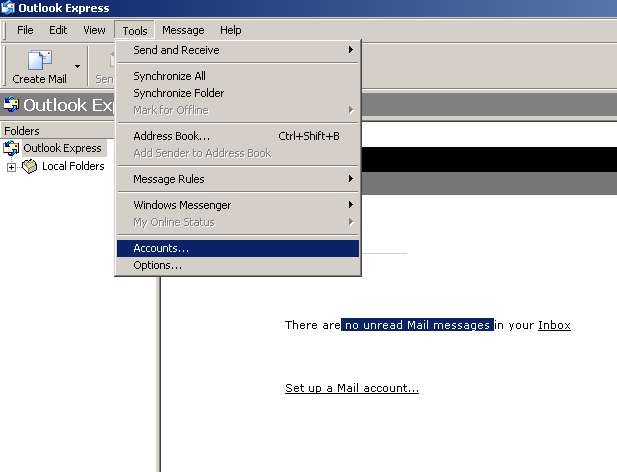
2- From the Tools menu at the top of Microsoft Outlook Express, click Accounts.
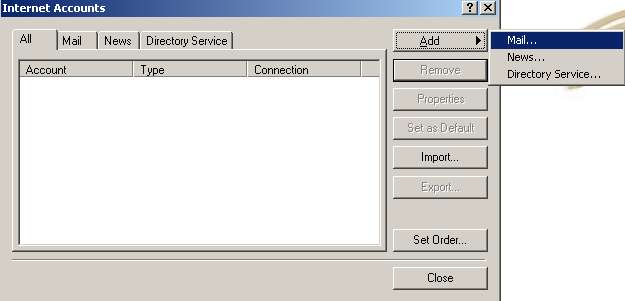
3- When you click Accounts , the Internet Accounts window opens. In the top right of the Internet Accounts window, click the Add button. In the small window that opens, click
Mail.
Mail.
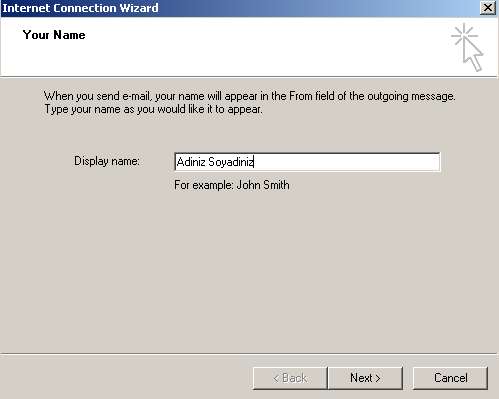
4- When you click Mail, the Internet Connection Wizard window opens. In the Display Name field, enter your first and last name and click Next.
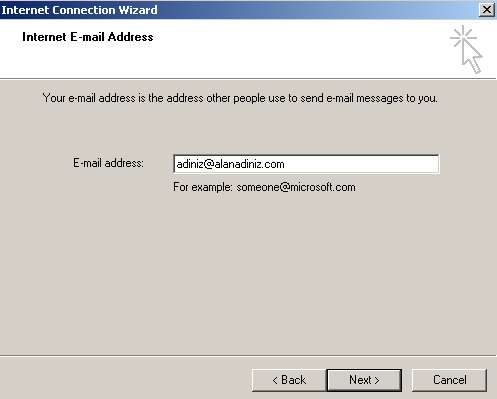
5- In the window that opens, enter your email address in the E-mail Address field and click Next.
6- In the window that opens, enter Incoming Mail (POP3) Server and Outgoing Mail (SMTP) Server in the fields: mail.yourdomain.com
(e.g. mail.webevi.com) and click Next.
(e.g. mail.webevi.com) and click Next.
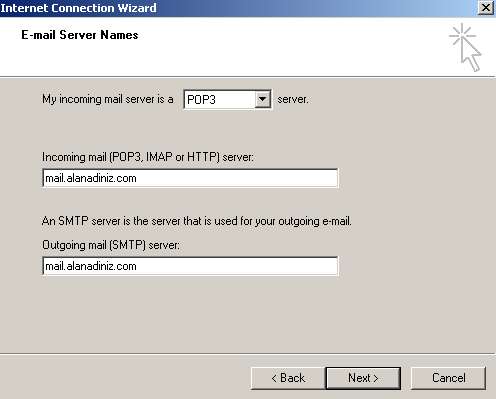
7- In the window that opens, in the Account Name field, enter your full email address, such as john@yourdomain.com. In the Password field below, enter your password.
IMPORTANT NOTE: Remember Password: if this box is ticked, you will not be asked for your password again.
IMPORTANT NOTE: Remember Password: if this box is ticked, you will not be asked for your password again.
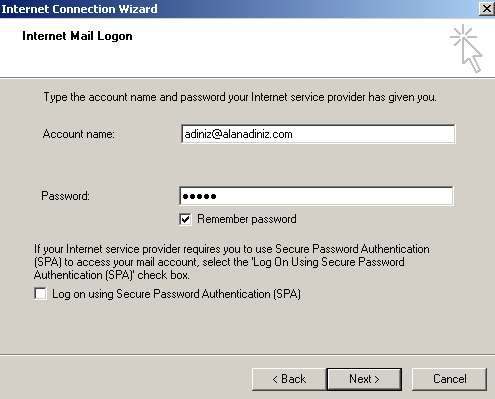
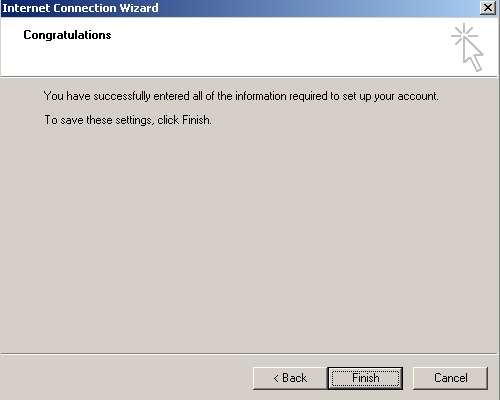
8- When you click Next, a window will appear saying that your email account has been set up successfully, and you will be asked to click Finish to save the settings.
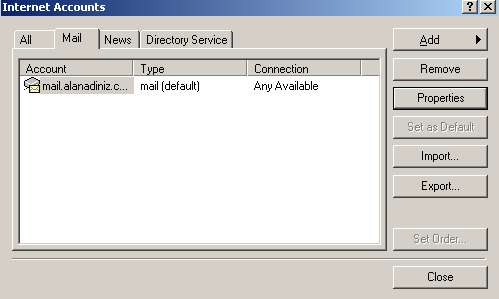
9- After this, in the open Internet Accounts window, double-click the default mail account.
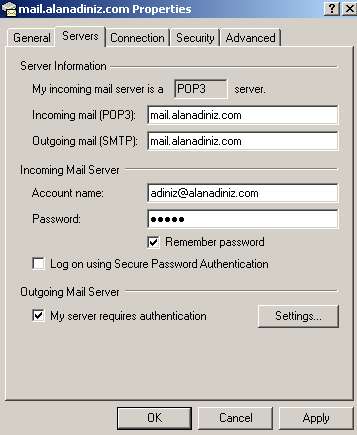
10- In the window that opens, select Servers and, under Outgoing Mail Server, enable My Server Requires Authentication and click OK.
IMPORTANT NOTE: Under Advanced, change the SMTP outgoing mail server port number from 25 to 587.
IMPORTANT NOTE: Under Advanced, change the SMTP outgoing mail server port number from 25 to 587.
11- Once your email account is set up, you can send and receive email by clicking Send/Receive in the menu.