Outlook 2010 Mail Setup
This page explains step by step, with pictures, how to set up your POP3 email account in Microsoft Outlook 2010. The email addresses and server addresses shown in the pictures are examples only, so do not enter the information shown in the pictures. Follow the steps below in order and enter your own email account details in the indicated fields.
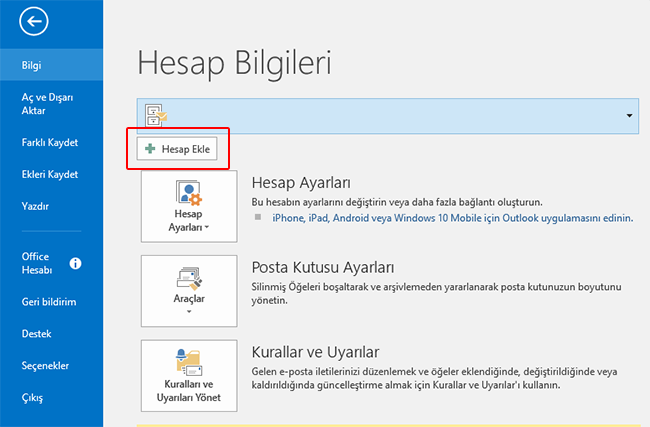
1- File tab: click the Add Account button.
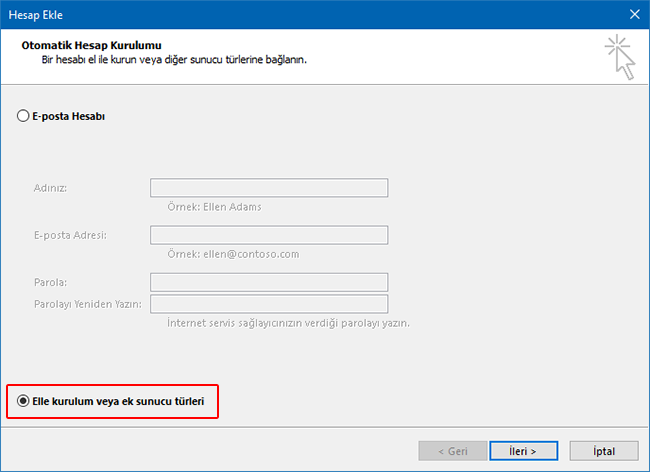
2- In the window that opens, select " Manual setup or additional server types ".
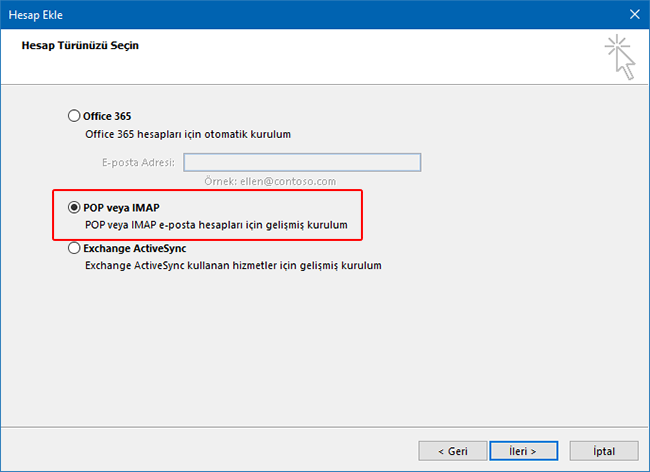
3- In the window that opens, select POP or IMAP.
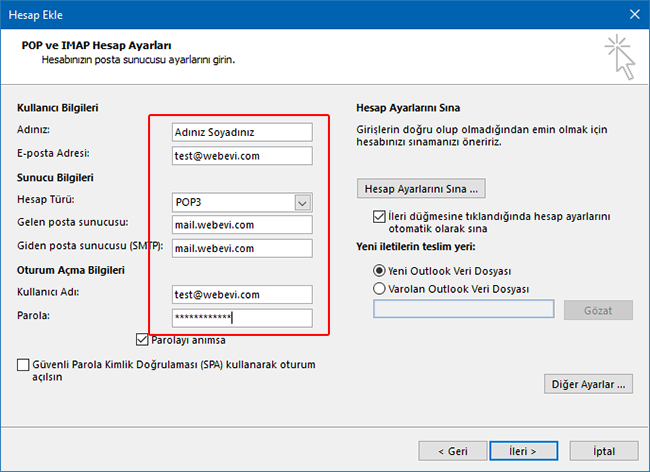
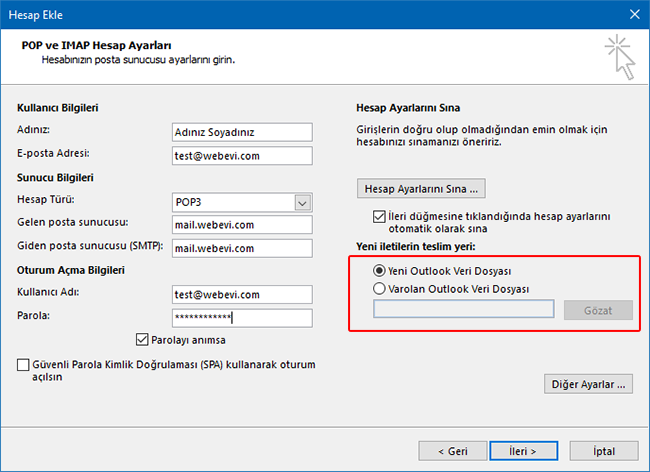
4- In the window that opens, fill in the fields as shown in the picture.
5-
In the marked area of the screen below, choose whether the email address you are setting up should be added to a new Outlook data file or to an existing one.
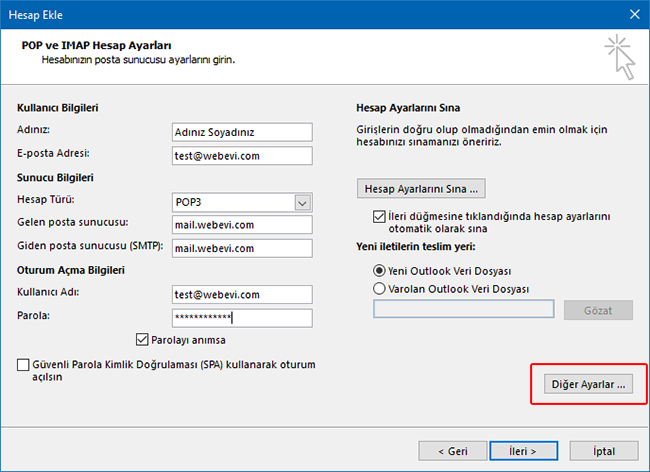
6- To continue, click the More Settings button.
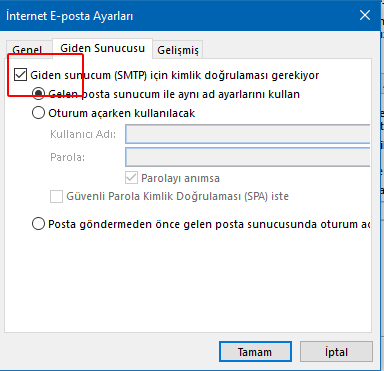
7- In the new window, click the Outgoing Server tab and tick the marked checkbox.
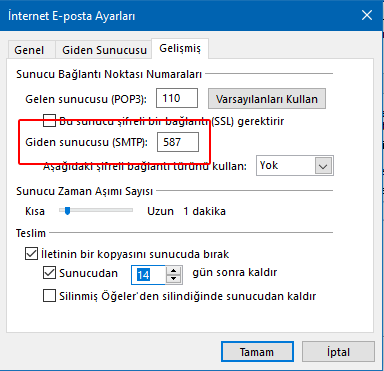
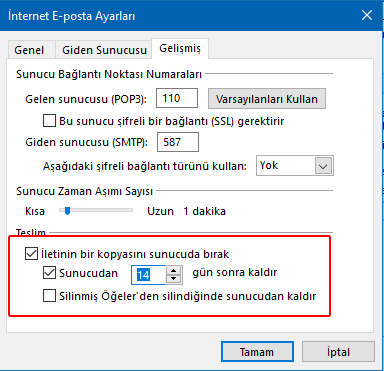
8- In the marked field, enter 587. By default this number is usually 25.
9-
On the same screen, at the bottom, you can set how long your incoming emails are kept in the mailbox on your hosting space.
Please note: Depending on your email traffic and mailbox size, the mailbox may fill up. In that case, emails sent to you will bounce back without reaching you.
Please note: Depending on your email traffic and mailbox size, the mailbox may fill up. In that case, emails sent to you will bounce back without reaching you.
10-
Click OK and then Next to close the windows and finish the setup.
11-
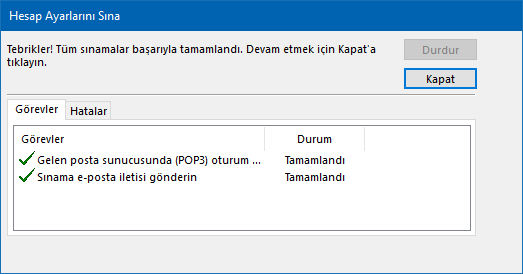
The Test Account Settings screen will appear automatically and run for a short while.
If all your settings are correct, both tasks will complete successfully. Otherwise, you have most likely made a mistake.
If all your settings are correct, both tasks will complete successfully. Otherwise, you have most likely made a mistake.
10-
We wish you pleasant emails...